What’s the difference between a chamberlain and a liftmaster garage door opener? Which one should you get?
The Wi-fi and MYQ features of the Chamberlain seem like an overkill (and an upsell) but they’re really worth the extra comfort.
With their app, you get a notification every time the door is opened and even remote open it to let someone in. Its remotes operate on CR2032 batteries that need to be replaced every twelve months; not that this is a big deal but your phone doesn’t ask for new batteries. It doesn’t work with Alexa though. The 8550W Liftmaster is powerful too and you will be surprised that its quiet.


Either way, the Chamberlain and Liftmaster garage door openers both have the same internal components and the only thing that sets them apart is in their rails. This is why handymen charge the same (about $100 for installing either model).
Installation is pretty basic and you could do it on your own in two hours. In fact, installing the outside pad doesn’t take time as its wireless.
Here’s a chamberlain vs liftmaster comparison. There are both great. If you’re looking to save a few bucks, getting a quiet motor would be an overkill considering that the opener runs for only two minutes.
Chamberlain vs Liftmaster: Why most people prefer the Chamberlain
OUR TOP PICK
In terms of durability, this is the best rated garage door opener in the market. However, please note that even the best motor will wear out when running on old/rusty rails or an un maintained door.
How To Install It?
Go through the product manual before installing this unit; paying attention to the safety precautions. The manual has a step b step guide too on how you configure the Wi-Fi to work with your smartphone and garage door opener.
The support team are reachable via phone and email too if you ever run into installation errors (which will certainly not happen).
Design and functionality
The garage door opener has a premium feel to it. The unit is aesthetically pleasing, though I doubt if this will be the biggest factor you’ll be considering. Either way, it will compliment your garage’s décor. How’s this important? With their app, you can open the door for Delivery guys or that friend that comes to borrow your bicycle and they will certainly notice that you’re making the mist out of technology.
Features
It’s three quarter horse power motor will strain when lifting doors heavier than 600 pounds. Fortunately, even the largest double doors weigh less than 400 pounds. Download their MYQ app from Apple app store or Google Play store and you will be able to lock/unlock the door from anywhere. Am I the only one that forgets if I locked the garage door? The app is a savior. In fact you could even schedule the door to lock every day at a certain time or turn on the lights before you get home.
Theirs another innovative use of the MYQ app too: when you’re on vacation, schedule your garage lights to turn on and off and your nosy neighbors (and burglars) will always think that you’re home. Won’t the garage door fail to open when there’s power loss? Not if the Chamberlain garage door opener comes with a backup battery. The battery will last a week and I doubt if the power will be off for this long.
Noise
In the Whisper drive mode, the motor won’t be as noisy. This feature will be beneficial if the bedroom (or living room) is next to the door. Older garage door openers were noisy and we still git used to it. The whisper drive feature is a gimmick and won’t be as practical as you think. Either way, if you come home late and leave early, you will want a quiet unit that won’t wake your sleeping kids or spouse.
OUR TOP PICK

Installation is everyone’s biggest challenge when installing a garage door and here’s a video showing how easy it is
Installing a garage door is one of those things you could “learn on the job”. With YouTube Videos, installation manual and the product’s support team, you could do it on your own or get a handy man to fix it for about 150 bucks depending on the state.
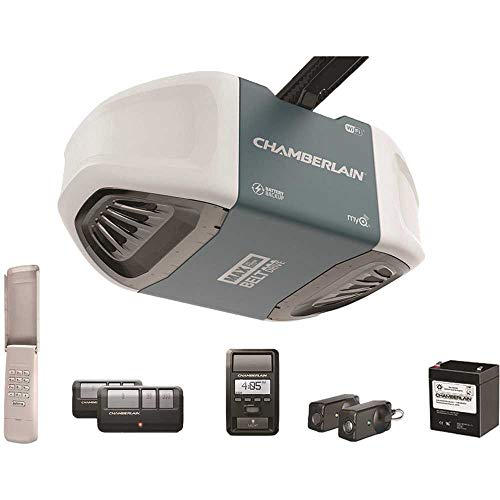
Design and functionality
The Black and red color scheme is easy on the eyes. However, garage door openers are basic items and if it locks and opens, then its good enough for the job.
This is a MYQ compatible garage door meaning that it can be configured to work with the inbuilt door remotes modern cars (manufactured in 2012 and beyond) come equipped with. Isn’t it relaxing knowing that you could control your garage door and home lighting system from, the same place?
Also, if you’re like me and often forget if you closed the garage door (and switched off lights), you could check the app. Unfortunately, the door opener doesn’t come with a MyQ gateway which is required when configuring it to your smartphone. You have to get it separately.
In their latest model, the motor noise is reduced too. However, note that some of the noise may be emanating from the rails and locking mechanism and not from the motor itself. Oil them regularly and this won’t be a thing.
Why do Garage door openers stop working (after a year)?
This depends on the Brand of the unit (cough, cough Linear, Lowes) and the door condition. Keep your door oiled up and the opener will last a lifetime (seriously)
The Chamberlain Door opener is great but How do I pair it with Google home without paying $1 a month. This door isn’t Alexa friendly and it kinda sucks. Who should pay for a monthly subscription to open a garage door anyway? Here’s a guide.
Rule #1: Proper Force Sensitivity
There is one quick, simple thing that you can do that will keep your kids, pets, and property safe, and drastically reduce the chances of expensive damage ever happening to your garage door. I refer to this as Rule #1 of Garage Door Openers.
It will only take a minute or two for you to check and adjust yourself if necessary, and it could literally save your cat’s life. More likely, it will prevent the number one most common and expensive type of garage door damage – top section damage.
Here it is:
Make sure that the force sensitivity settings on your garage door opener are set so that the door will stop and reverse if it encounters unexpected resistance on the way down. The door should also stop (and not reverse direction) if it feels resistance while opening.
The safety point here is obvious. You don’t want any person, animal, or property to be crushed by a garage door. But there is another important reason:
The number one most easily preventable garage door damage occurs when the garage door opener bends or breaks the top door section, usually after a broken spring makes your door too heavy to lift. If the open force sensitivity was set properly, it would have turned off as soon as it felt that the door wouldn’t move. All you have to do to prevent it is turn a nob and do a quick test.
Several times each week I see examples of the following series of events that in each case leads to hundreds, if not thousands, of dollars in damage:
- Garage door opener is installed and the force sensitivity is turned up too high. It won’t stop if there is a problem. And there are no problems for years.
- Years later, a spring (the counterbalance for the weight of a garage door) breaks from regular usage. As is always the case, the spring fails without warning. One moment the door works perfectly and feels like it only weighs a few pounds. The next moment the true weight of your door, hundreds of pounds, is dead on the floor.
- You don’t realize the spring is broken and attempt to run the garage door just like you did earlier in the day.
- The door won’t open, and the garage door opener won’t stop pulling. It bends the top of your door inward until it breaks. This will cost hundreds of dollars to fix, or you may even have to replace the top section or possibly the entire door.
How to Test the Force Sensitivity Setting
Testing your garage door opener’s force sensitivity is easy. Place a 2×4 piece of wood under the middle of the door, then run the door down. It should hit the 2×4, then reverse after a brief pause. It should not struggle before it reverses.
You can check by hand, too, but you have to be ready to let go of the door if it pushes too hard. As the door is closing, wait until the top sections enters the radius of the track near the end of the travel.
Grab onto a handle and give a firm pull, but don’t hang on and struggle if the door fails to reverse.
About 10 lbs. of pressure should be enough to cause your door to stop, then reverse direction until it is open. Make sure that you grip the door in such a way that you can let go and not get yourself stuck under the door if it fails to reverse

Your door should contact the 2×4, then reverse without struggling. On many openers, the close and open force settings are controlled with different dials. You will need to check the open force sensitivity by hand.
As the door is opening, press down on one of the handles when the bottom of the door is at about waist high. In order to avoid doing damage if it is set too high, always wait for the top section to be riding on the horizontal track before applying pressure as it opens. You should only need to apply about 10 lbs of pressure to stop the door. If it feels like the door would start to lift you if you held on, let go immediately.
Do Not perform these tests until you have read the rest of this manual and you have determined that your opener and arm are properly installed.
Adjusting the Force Sensitivity on Common Garage Door Openers On most openers adjusting the force sensitivity is as simple as turning a dial.
When adjusting the force settings, start by turning the dial or dials counterclockwise to the minimum setting. Be gentle as the dials can be damaged if you push in on it or try to turn it too far. Slowly and incrementally increase the force setting until you find the minimum setting that will reliably operate your door.
LiftMaster/Chamberlain/Sears-Craftsman Chain Drive, Belt Drive, or Screwdrive:
Chamberlain manufactures all of these openers. There are also many Chamberlain made openers out there appearing under a wide variety of different “private labels”, including Raynor, Wayne Dalton, Lift-E-Lift, etc. They are all the same thing.
Nearly all of these machines have identical force setting knobs and are thus easily identified. If you see any of these, you are dealing with a Chamberlain manufactured opener: Chamberlain manufactured openers have the most clearly labeled and easy to adjust force settings
Pro Tip: If you find that the force setting on a Chamberlain made chain drive opener is getting very touchy (meaning the door reverses with very little pressure even if it is set over “5” on the dial), it could be because the gear is beginning to strip out or needs to be lubricated. Or, the sprocket bearing may be starting to wear down or fail. Lubing may buy you some time but eventually the gear and sprocket assembly will fail.
Pro Tip: If you have a “screwdrive” opener made by Chamberlain, you should lube it before you test the force settings. These openers are known to be very touchy if they haven’t been lubed and may respond to less opposing force than the dial would indicate. This becomes a problem as it leads the motor to turn off for no reason, especially in cold weather. Simply run the door, and go along the length of the screw drive spraying silicone or white lithium lubricant into the channel that the screw turns in.
Genie/Overhead Door Screwdrive:
The Genie Screwdrive is one of the most popular garage door openers. On models manufactured since 1996, the force sensitivity is set by turning a little knob located under the light cover. You will probably need a screwdriver to get the light cover off. You will need to make very small changes, testing each time, as these openers tend to go from being too sensitive to not sensitive enough with very little turning of the knob.
Genie Screwdrive force control dials are on the right side on most models. Small turns may cause big changes in how hard your opener will pull or push, so be sure to test.
Genie/Overhead Door Chain or Belt Drive: The force sensitivity setting on these openers is usually located on the back panel (which may be under a light cover), or right on the bottom of the motor case.
It is a dial, just like on the screwdrive. You will need to make very small changes, testing after each time, as these openers have a tendency to go from being too sensitive to not sensitive enough with very little turning of the knob.
Do not confuse the limit adjustment (inside the curved cut outs on the back panel), with the force setting adjustment knobs on the right side, above the learn button. If you move the limit adjustment you will change how far up and down the door goes.
The button that says “limit set” activates the door, just like the wall button would.
Some newer Genie openers have force setting dials on the bottom Genie/Overhead Door Chain Glide: These are among the worst garage door openers on the market.
The force settings are clearly labeled. Never operate one of these without the door connected, as the chain and carriage will suck back into the motor or run off the end – a truly poor design, the limit switch that tells it to shut off is only triggered by the trolley, which moves with the door, so if the door is disconnected it doesn’t know to stop.
Wayne Dalton Quantum and Pro Drive: Another contender for worst garage door opener on the market. There is one little dial located on the side of the motor that controls both the open and close force sensitivity. Make small adjustments, checking after each one, and be gentle as it is easy to break these little buttons.
Note: On many of the newer opener models, from all major manufacturers, the force sensitivities are self-learning, and there is little you can do to adjust them. These openers should always pass the safety testing, but they can cause unwanted reversing or turning off if installed on a door that isn’t properly balanced or otherwise runs rough. If you are having trouble getting one of these to operate reliably, there could be a problem with the door itself. .
Rule #2: Openers Must be Installed at the Proper Height
When your garage door is opener, there should be less than five inches of space between the top edge and the opener rail. Many openers I see are installed way too high above the door.
The result is downward force by the operator “J” arm rather than horizontal force. If something obstructs or binds your door, the arm pushes down hard instead of forward, potentially cracking and bending the top of your door.
To make matters worse, the J arm may pivot on the strut or other reinforcement running along the top edge of the door. This creates a powerful lever that can make the damage even worse.
If Rule #1 about the force sensitivity is also being violated and the opener doesn’t stop, it can pull the top half of your door right out of the tracks.
A piece of 2×4 wood makes a nice spacer between the top of the door and the opener rail during an installation or lowering your current opener to the proper height. With the door secured in the open position using a clamp or vice grip, place a 2×4 along the top of the door.
Rest the opener rail on the 2×4 when you measure and hook up your hangs. If the top of your door is bent or sags, you may need to use two 2×4’s.
There is no minimum amount of space required between the door and rail. As long as it doesn’t rub, and the top section doesn’t bind on the rail as it turns through the radius of the track, everything will be fine.
The easiest way to get the height right is to use a 2×4 as a spacer.
Build your “back hangs” with the opener resting on the 2×4.
Pro Tip: The opener rail will slope downhill from the mount point on the header above the door to the hangs for the motor. Do not worry about making it level, it doesn’t matter. Trying to make the rail level will often lead to hanging it too high above the door.
Proper “J” Arm Installation
Improper J arm setup is the final major installation failure that I see causing problems out there.
This tends to lead to issues that slowly develop over time due to jerky motion, such as the arm mount pulling out of the door.
But if your door gets stuck shut due to something you didn’t expect (like a broken spring, or something leaning against the track) and your opener is in violation of Rule #1, an incorrect J-arm installation can lead to lots of unnecessary damage that is expensive to fix.
The most common error is failure to get a solid mount on the door. This usually happens when trying to screw the manufacturer’s provided bracket into a steel door that doesn’t have a solid mount in the right spot. If there is any movement in the mounting point when the door operates, it will eventually fail.
Many Wayne Dalton brand doors now come with a mounting bracket that attaches to the top edge of the door. This is a terrible design that leads to thousands of broken top sections each year. A new top section on a 16’ wide door will run you about $500 with no windows or $800
with. It is well worth changing to a sturdier mount that distributes the force from the arm more evenly.
The next thing many people do wrong is they put the arm on too shallow of an angle. This fights the natural action of the door as it opens and closes, and does not smoothly move the top section through the radius of the track. The most common failure occurs when spring eventually breaks, causing the door to become stuck in the down position. If the arm is on a shallow angle, it is much more likely to damage the top of your door.
Finally, it is important to mount the J arm at the proper point. The ideal placement is even with the top rollers (a little above or below is fine, but the closer the better). Too low and your door may have a jerky action when lifting off the ground.
Note:
Making changes to your garage door opener installation height or J arm will likely require that you also adjust the “travel” limits to prevent it from rebounding off of the floor or stopping short on the way up.
You will need to consult the instruction manual for your specific garage door opener. Always make these adjustments with the force sensitivity on a very low (sensitive) setting.
Always make small adjustments to the travel, testing after each change.
Conclusion
Following my advice could save you literally thousands of dollars. It will also ensure that your garage door system is safe for your family, pets, and property. Even if you have to pay a professional to make these adjustments for you, it will be a lot cheaper than dealing with major damage when it inevitably happens.
Tens of thousands of homeowners spend way too much money on their garage doors every year. You don’t have to be one of them. Take a few minutes to educate yourself and inspect your garage door and opener system before it breaks.