

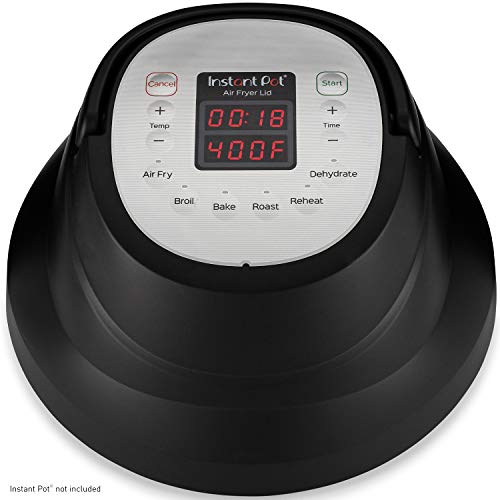
Instant Pot Air Fryer Lid (Recommended)
Top Features
- 3Qt to 10Qt capacity
- Compatible with these Instant Pot Models – Duo, Duo Nova, Duo Plus, Duo 6 Qt, pressure cooker air fryer
- Not compatible with the Duo SV 60, Duo Evo Plus 60, Smart Wi-Fi 60, or Max 60
- Changes instan pot to an air fryer
- Only works with Instant Pots having stainless Steel baskets
- Multiple safety features
WHAT IS THE INSTANT POT AIR FRYER LID?
Functionality and Build
So, in the latter parts of 2019, the IP Company released its newest addition to the family, the Air-Frying Lid, which is impressive for its functionality to air fry, bake, roast, dehydrate, broil, and reheat a wide range of foods.
It is a single lid attachment for the existing instant pot bought separately for added cooking functionality. This means, if you already have a current instant pot, switching into air frying mode will only require replacing the pressure-cooking lid with the air frying one for the new operation. However, the lid caters to this collection of instant pot’s; the Duo 60, Duo Plus 60, Lux 60, Ultra 60, Viva 60, Nova Plus 60, Duo Nova 60. The lid will not work with the Duo SV 60, Duo Evo Plus 60, Smart Wi-Fi 60, or Max 60.
Like every other air frying device, the IP version uses a hot air blowing mechanism over foods, which makes them crispy, crusted, baked, or dried after pressure-cooking or not. This method means that you have the option to brown rotisserie chicken after pressure-cooking for that drool-deserving crust. On the other hand, you may kick-off baking some chocolate chip cookies directly with the air frying lid and still turn out with cookies that are crunchy yet melt in your mouth. I genuinely find my possibilities to be endless with the instant pot, and with Easter coming up, I am excited about the many dishes yet to share.
Operation
The reasonably large package of the lid, measuring 13.9 x 12.8 inches and weighing 11.6 pounds may seem bulky for one that could sit a small instant pot. However, you can ascribe the blame to its accompanying accessories that aid with successful air-frying.
In each package contains the air fryer lid, a multiple-level air-frying basket, a base aimed at the basket, a dehydrating/broil tray, a protection pad to sit the lid on while it is hot and manual for usage.
Like a traditional air fryer, using the lid requires either positioning food in the air-frying basket or broiling tray to enable it to rotate and cook food evenly using its burner and fan. This process implies that it is not safe to air-fry directly onto the lining of the instant pot. For example, if browning rotisserie chicken, it will be necessary to transfer the food to the air-frying basket before proceeding with browning. Although a little mess to be created, the outcome makes you forget the wipe of extra juice dripped on the counter.
The Various Functions
The decisive moment is here, which is what got everybody curious when we heard the news of the lid’s release. What does it do?
The lid caters for six cooking functionalities, all positioned on the lid without any need to adjust any functionality directly on the instant pot. It allows you to air fry, bake, roast, dehydrate, broil, and reheat, and you get to adjust cooking modes, temperature, and time setting all on the lid. Let’s look at what each function offers:
Air-fry: Air-frying is a smart way to cut down the use of oils when frying foods with the hot air blowing technique that crisps foods better than deep-frying. This function is ideal for fried chicken, shrimp, crisping vegetables, etc. It uses a default temperature range between 300 F to 400 F, and a cooking time range between 1 minute to 1 hour as the recipe calls. Always use the air-fryer basket for this method.
Bake: Everything bake-able works just as fine with this cooking function from casseroles to desserts. It serves as a mini oven giving you the option to either bake foods in the air fryer basket or introduce a safe accessory like a springform pan. When using the air-fryer basket, make sure to line its inner parts with foil or baking paper before pouring in the batter. On the other hand, if using a safe cake pan, ensure to elevate the pan with a steam rack when cooking. Also, bake without covering except the recipe calls for it. To affect the function, work between a temperature range of 180 F to 380 F and a cooking time range of 1 minute to 1 hour. The ideal tools to use will be the air fryer basket, broil/dehydrating tray, or a safe-oven baking dish.
Roast: Any roast ideas in mind for the weekend? If you’ve got your lid, then it will be an easier, faster, and more effective turnout. This function is excellent for all roast recipes using pork, beef, poultry, vegetables, lamb, and many types of meats. It creates the perfect crisp and crust on meats and gives vegetables that mouth-watering golden-brown exterior. For the right cook, activate the Roast mode on the lid and set the temperature and timing between 250 F and 380 F, and 1 minute and 45 minutes respectively. The right accessories to use are the air fryer basket or broil/dehydrating tray.
Dehydrate: When you find a device that can dehydrate fruits, vegetables, and jerky meats the best, you almost want to give your traditional oven away. That’s how I feel with the IP air-fryer lid after churning out the best apple and pear crisps that I have ever made. Using a 105 F to 165 F temperature range and allowing cooking between 1 hour to 72 hours, extraction of juices from foods turns out the best. For dehydrating your pieces, work with the air fryer basket or broil/dehydrating tray for the best results.
Broil: I have tried making French onion soup with the instant pot but always had to introduce a torch to get the right melt and color of gruyere cheese on the soup after the cook. It is a breeze to use the same air-frying lid for this process with a little adjustment. This broil function creates the best direct-to-heating source browning effect on foods like casseroles, Crème Brulee, etc. by enabling the broiling mode. Place foods directly or indirectly in the air fryer basket or broiling/dehydrating tray, then choose your perfect browning temperature between 180 F and 380 F and cooking time range between 1 minute to 1 hour.
Reheating: While all the instant pot models allow an option to keep food warm after cooking, the air-fryer lid allows for reheating crusted or crisped foods at best. It especially prevents overcooking or over-drying foods, which provides for a temperature range between 120 F to 360 F only and a cooking time range of 1 minute to 1 hour. When reheating foods, make sure to place them in either the air fryer basket, on the broil/dehydrating tray, or a safe-oven baking dish.
Reasons I’m Loving the IP Air-Fryer Lid
It may sound like to early a time to be heavily hooked a new device, and I don’t despise that. However, when an invention works so well for its first release, it is always the right place to talk about its goodies. From my side, having used the air-fryer lid these past weeks, I can share a handful of benefits that the equipment has brought to my culinary life. Although I am still exploring and taking notes on its other, not so great elements, let’s introduce ourselves to it on the goodness. Shall we begin?
Buy a lid and be good to go!
If you already own an instant pot model that accommodates the air-fryer lid, then that is all you need to have both worlds. You do not need to purchase another device to air-fry, bake, roast, dehydrate, or broil. With a single instant pot and both lids, pressure-cooking and air-frying, cooking for yourself, the family, and everyone else just got seamless.
It is super easy to work with
Like the instant pot, the air-fryer lid only requires a few buttons pushes here and there, and you are set to make some scrumptious dishes.
It is a thoughtful guide
While cooking with the lid, it will signal you halfway with a beep, and the screen will tell you to flip the food. Now, that is a thoughtful addition to its make to remind you to shake the basket or flip the food just in case your mind wandered off a bit.
It signals you when the lid is placed on correctly
Like the instant pot, a jingle sound is made to inform you that the lid sat on rightly. The air-fryer lid does the same, so you can proceed to apply your functions after that sound.
It allows a good worth of food
The air fryer basket may seem small to the eye but do not be deceived. I comfortably fitted in a good bunch of chicken wings for a six to eight serving size and had a good cook at it.
Maintaining the Air-Fryer Lid for Longevity
It is still a new one out here, so I am still testing ways to use the lid in ways that will keep it around for a very long time. These are my best bet yet:
Avoid electrical damage
Never immerse the lid, its power cord or plug in water or any form of liquid to be cleaned. You stand a chance of damaging the lid and creating electrical shock for yourself.
Use the lid for what it’s design
Firstly, never try deep-frying in the instant pot and trying to use the lid over it. While this may sound unheard of, it is still the right place to make a mention.
Secondly, always use the lid with its right accessories and never with the stainless-steel insert of the instant pot.
Don’t kill two birds with one stone
Never plug the Air-Fryer lid and instant pot cooker base at the same time. You stand a chance of destroying either of the lids or both. Always connect one after the other’s use.
Clean the device well
During cooking, grease and food may splatter and build up around the heating element, which could lead to smoke, fire, and personal injury. After each cook and cooling cycle, make sure to clean the lid very thoroughly and leave it to air dry before the next use.
Benefits of Using Air Fryer
One fact is that air fried foods are still fried. Unless you’ve decided to eliminate the use of oils in cooking, you must still be cautious about the food you eat. Despite that, it clearly presents a better and healthier option than deep-frying. It helps you avoid unnecessary fats and oils, which makes it an ideal companion when you intend to lose weight. It offers a lot more benefits, which include the following:
It doesn’t give off unwanted smells when cooking.
You can use it to prepare a variety of meals.
It can withstand heavy cooking.
It is durable and made of metal and high-grade plastic cup.
Cooking using this appliance is not as messy as frying in a traditional way. You don’t have to worry about greasy spills and stains in the kitchen.
This novel technology has made it feasible to fry, roast, steam, bake, or grill any cuisine in one pot easily and without too much effort.
Another chief advantage of this wonderful advanced equipment is only needing to use a small quantity of cooking oil as compared to any other types of fryers.
This device is super easy to clean after using, and it saves a significant amount of time when making food.
Plus, this machine is super beneficial when it comes to health because it can help you prevent several cardiovascular diseases. Because of the tiny amount of oil required to fry, the results will contain less than 80% of Cholesterol than any other normal fryer. The fan and grill allow air to circulate into the fryer and fry the food.
Tips for Using Your Air Fryer
1-Attach the Control Panel
For safety reasons, if the control panel of your semi-professional fryer is not properly connected to the appliance (on both sides), your fryer will not turn on. It is important always to press the control panel down until you hear a click. In other fryers, always check that all accessories are well fixed or recessed.
2-Adding Oil
Pour oil or grease into the fryer before turning it on. Warning: without oil, the resistance may burn and damage the device.
Pour enough oil into the fryer before turning it on. The oil level must at least reach the minimum level without exceeding the maximum level. If it exceeds the prescribed amount, the oil may spill out of the fryer as soon as you dip the basket in, which could result in burns.
3-Oil Level
Take the opportunity to renew the oil. If you prefer to wait, be sure to add the same type of oil or grease. We do not recommend mixing different oils, as they can react with each other when they heat up. Each oil has its own cooking temperature and shelf life.
Important: when you add oil or grease, it is not extending the shelf life of what is already in the fryer.
If you use solid grease, melt it according to the instructions in your user manual. Keep in mind: not all fryers are suitable for using solid fats. Opt-in this case, preferably for a model equipped with a special indicator that controls the oil melting.
4-Kinds of Oil
Oil quality is an essential element. There are two types of frying oils:
Vegetable oils such as peanut oil is very suitable for frying. In addition, they are better for health because they are less abundant in bad Cholesterol.
You can also prepare your fries with lard (beef fat or pork) that give potatoes a distinctive flavor. But as shown above, not all fryers can be used with solid fat.
5-When to Change the Oil
The oil should not ever be dirty. Always put new oil approximately every ten uses, or sooner if it starts to get dark, smelly, or smoky. Remember that if you also use your fryer to fry sandwiches, croquettes, or donuts, you should renew the fat more often.
In the case of cold zone fryers, you will find that the oil gets dirty less quickly and can keep longer. How does a cold zone work? Under the resistance, there is an area that does not heat directly, where the temperature remains lower. Waste and crumbs are deposited at the bottom of the fryer and do not burn. Your oil stays clean for longer, and it is better for your health! Does your fryer have no cold zone? Don’t panic! Filter your oil with a special paper filter, and that’s it!
6-How to Make Perfect French Fries
If you put too many fries in the fryer at the same time, the oil temperature may drop too quickly, which would not guarantee optimal results. Always read the instructions on your device carefully before using it, and do not exceed the recommended amount of potato slices.
Do you want to make crispy fries on the outside and soft on the inside? Choose floury potatoes like Bintje. Later, wash your fries thoroughly in cold water to remove as much starch as possible, then dry them at once with a clean, dry towel. Preferably cook twice. Start by previously cooking your fresh fries for 4 to 8 minutes at 150°C, and then let them cool for half an hour. Then cook them a second time at 180-190°C.
Do you use frozen fries? The first cooking is not necessary because they are already precooked. Nor is it necessary for fries to be cooked beforehand because they are very thin.
Good to know cooking time varies depending on the type of potato used.
7-Do you use an oil-free fryer?
In principle, you should not preheat your fryer without oil, but it will take a while for the appliance to reach the desired temperature. How do you know if the fryer is ready? An indicator light comes on, or a signal is activated which indicates that the temperature has been reached and you can now adjust the preparation time.
It is not necessary to add oil. You will only need to add a tablespoon of oil if you are preparing fresh dishes such as chicken without marinade or fresh French fries. All pre-cooked foods, such as frozen fries, croquettes, and snacks, can be cooked without oil. Use peanut oil, sunflower oil, or olive oil, but never taste bad nut oil.
On some models, you should never pour the oil directly into the bowl or basket. Pour the oil over the ingredients after placing them in the pan. For models with a basket, mix the fries and oil in advance in a bowl. For best operation, do not overload the appliance and do not forget that the capacity decreases when cooking frozen food.